In this section I hope to bring you some of the items of Equipment and various inventions developed by some of our
members who have a very keen interest in this aspect of beekeeping. If you have something
that you would like to share with your fellow beekeepers, please email the
details to me. Your name will be on the "credits". (webmaster)
Click
on the picture for an enlargement
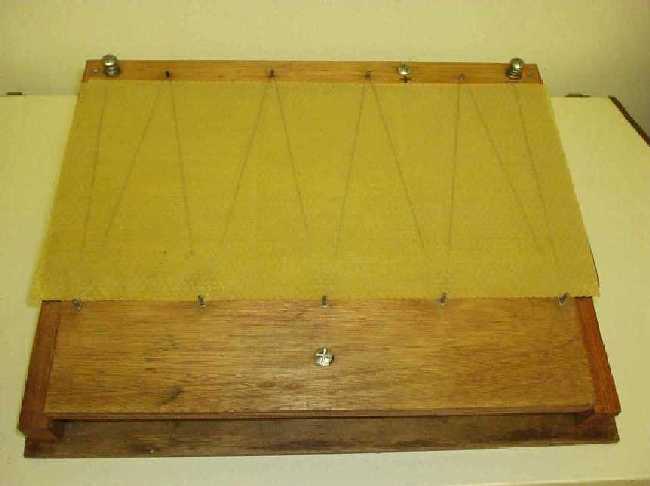
 The adjoining pictures illustrate some pieces of equipment constructed by yours
truly (webmaster),
to hotwire brood foundation, though I do not take credit for the original
concept, which I believe I might have seen at our "resident inventor's"
home. George Kinman) the actual final design and construction, was my own handiwork,
and could be emulated by any one with simple tools. (I am hoping that I
can persuade George to make a regular contribution to this section)
The adjoining pictures illustrate some pieces of equipment constructed by yours
truly (webmaster),
to hotwire brood foundation, though I do not take credit for the original
concept, which I believe I might have seen at our "resident inventor's"
home. George Kinman) the actual final design and construction, was my own handiwork,
and could be emulated by any one with simple tools. (I am hoping that I
can persuade George to make a regular contribution to this section)
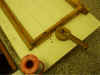
 If
you click on the pictures you will see that I have catered for both Brood and
Super foundation. The power to heat the wire was from a battery charger set to 6
volts 2 amps. and attached to the terminals that can be seen at the rear of the
unit.
If
you click on the pictures you will see that I have catered for both Brood and
Super foundation. The power to heat the wire was from a battery charger set to 6
volts 2 amps. and attached to the terminals that can be seen at the rear of the
unit.
 You
will further note that the power is applied through a micro switch under the pressure
plate hinged on the front of the unit, at the same time as the pressure plate is
depressed to apply tension to the Wire.
You
will further note that the power is applied through a micro switch under the pressure
plate hinged on the front of the unit, at the same time as the pressure plate is
depressed to apply tension to the Wire.
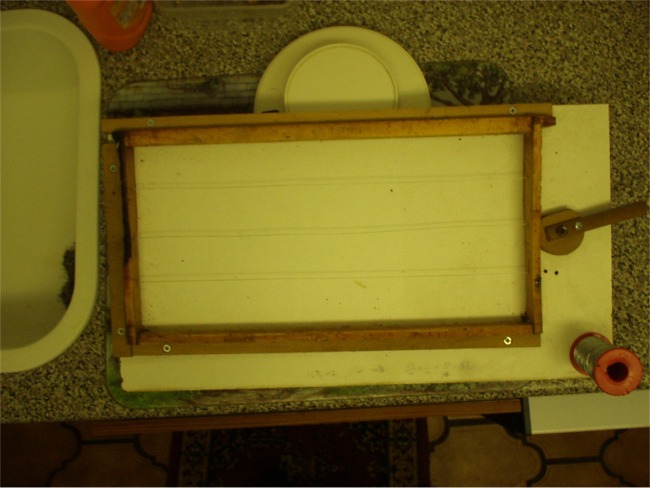
 I
made up this frame work to assist me to wire up my super frames. Since a lot of
my frames do not cater for pre-wired foundation. I have found it a simple matter
to use the same holder when applying the foundation to the frame. It is a simple
matter to apply the positive and negative probes to the two terminating pins for
the wire. And Voila with a little assistance the wire melts in.
I
made up this frame work to assist me to wire up my super frames. Since a lot of
my frames do not cater for pre-wired foundation. I have found it a simple matter
to use the same holder when applying the foundation to the frame. It is a simple
matter to apply the positive and negative probes to the two terminating pins for
the wire. And Voila with a little assistance the wire melts in.
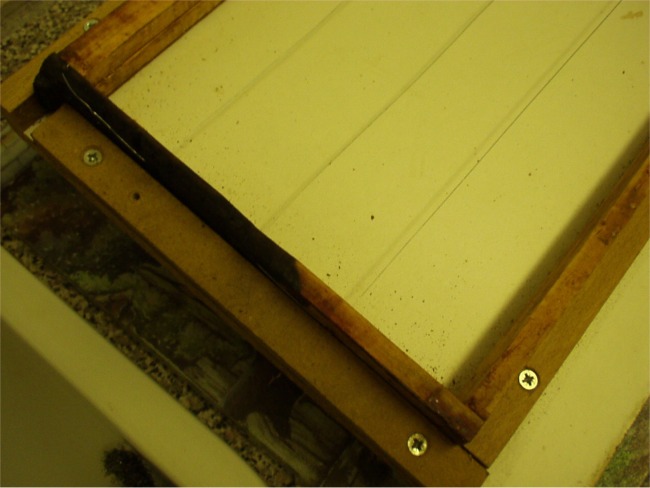
 I
found it worth while to make the frame holder a "snug" fit. You will
also note that I am using a homemade camming device at
I
found it worth while to make the frame holder a "snug" fit. You will
also note that I am using a homemade camming device at
 the
side of the frame. You can see that it effectively bends the side frame in, so
that when the wire is pinned, and the cam released. the wire assumes a nice
tight condition. This is important as you will find when you apply even the
smallest current the wire will expand. It will contract again when power is
removed.
the
side of the frame. You can see that it effectively bends the side frame in, so
that when the wire is pinned, and the cam released. the wire assumes a nice
tight condition. This is important as you will find when you apply even the
smallest current the wire will expand. It will contract again when power is
removed.
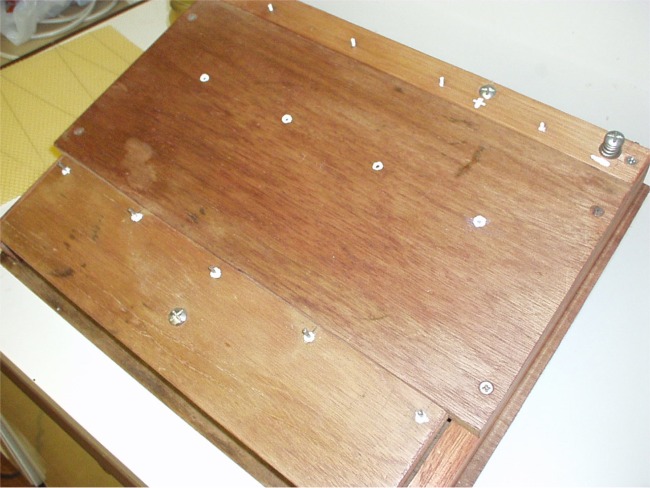
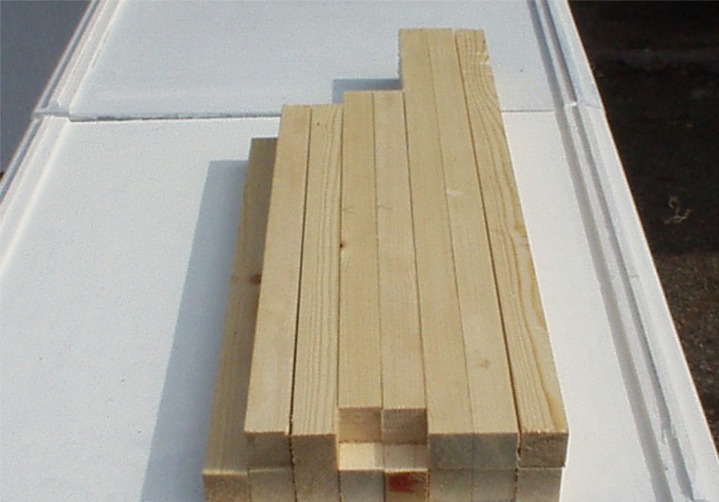
A lot has been talked about recently of the open mesh floor, and its
desirability. It is said that it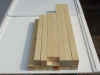 allows the Varroa mite to fall through, and makes it difficult for them to re
-enter the hive. It is further alleged that together with an insulated blanket
over the cover board it is better during the winter in so far as it stops
condensation. So I thought I would give it a try with G.Ks. mark 1 design with
minor mods. To
the right is a flat pack of the timber required, but not showing the mesh. Total
saving of about 75% on what you might pay from the big suppliers.
allows the Varroa mite to fall through, and makes it difficult for them to re
-enter the hive. It is further alleged that together with an insulated blanket
over the cover board it is better during the winter in so far as it stops
condensation. So I thought I would give it a try with G.Ks. mark 1 design with
minor mods. To
the right is a flat pack of the timber required, but not showing the mesh. Total
saving of about 75% on what you might pay from the big suppliers.
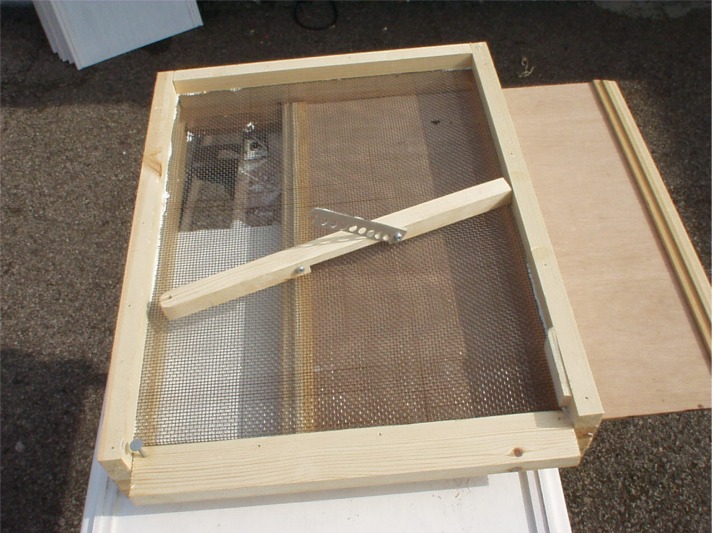
It
can be seen that it is a simple design, and well within the capabilities of the
average DIY 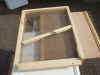 enthusiast.
It is illustrated here, assembled together with the entrance block and mouse
guard. You can also see the removable Varroa monitoring tray. I
chose to paint all the components white,
enthusiast.
It is illustrated here, assembled together with the entrance block and mouse
guard. You can also see the removable Varroa monitoring tray. I
chose to paint all the components white,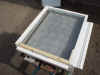 simply because I had loads of white undercoat and gloss left over from household
jobs. If my last job in the house had required pastel pink they might have
finished all pink. I believe that at Buckfast they also use different
colour schemes. All that is left now is to try them out this winter
simply because I had loads of white undercoat and gloss left over from household
jobs. If my last job in the house had required pastel pink they might have
finished all pink. I believe that at Buckfast they also use different
colour schemes. All that is left now is to try them out this winter
George has
produced an excellent video taking you through the complete construction step by
step. He is amenable to loaning the video to those interested.
copyright to all illustrations and photographs is retained.

 Charity Number : 1014600